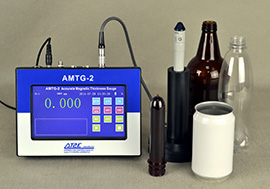
Accurate Magnetic Thickness Gauge
 The “AMGT-2” is a portable feeler gauge. It is used to measure the thickness of non-magnetic materials, such as plastic, glass, ceramic, aluminium, copper etc…The accuracy of the measurements is not affected by the shape of the sample.
It’s designed by basing on the method of the Hall Effect. Simple and rapid as below:
- Place the steel ball on the side of the sample and the probe on the opposite side.
- Move the sample and let the probe to be the tested position.
- The steel ball will be drawn by the probe automatically.
- The Hall Effect sensor on the probe measure the distance between probe tip and the steel ball
Advantages
- Non-destructive measure
- High resolution 7* touching screen
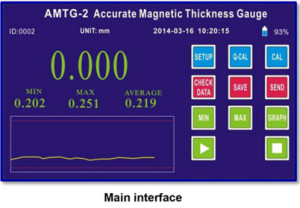
- Dynamic display: measuring value/ graph/ date/ hour/ battery
- Full aluminium frame
- Fast and accurate measurement of the thickness
- Achieving accurate thickness measurement in corners, small radius and some irregular shape
- Display real-time measurement value
- Max and Min Mode: Automatic capture of the maximum or minimum value
- Value difference function: Display the value difference between preset value and actual measured value
- “CYCLE” function: Record the Max, Min, Average value & Graph during the predefined time.”Delayed start and Auto-stop” function frees the hands of operator and it’s convenient for large-size sample measuring.
- Alarm function: Programmable, warns the high or low preset value by sound or visual indication
- Password function enables the safety of the calibration data and measuring data
- Can store 9999 measuring data

Technical characteristics
- Measure mode: Normal/ High accuracy
- Display mode: Real-time/ Minimum or Maximum
- Resolution: 0.01 mm or 0.001 mm (0.001” or 0.0001”)
- Display: TFT screen display the real time reading, minimum reading, alarm status and data info
- Outputs: RS-232
- Calibration: Multi-point calibration (up to 13 points)
- Power: DC 8.4 V
- Battery: Rechargeable lithium battery. Full Loaded working time without charging is approx 2-3 hours.
- Units: mm/ inch
- Language: English
- Dimensions: 210x150x65 mm
- Net weight: 2 Kg (Package weight 5 Kg)
- Measure range and accuracy (Custom made for range 0-8 mm)
| Steel Ball Dia | Thickness upper limit | Accuracy |
|---|---|---|
| 4.76 mm | 6.35mm | 1% +-0.003 |
| 3.18 mm | 4.75mm | 2% |
| 1.59mm | 2.29mm | 3% |
Standard configuration
- Standard probe with cable and stand
- Using manual
- Charger
- Steel balls* and supports
- Steel balls include: 1.59 / 3.18 / 4.76 mm
- Calibration block include: 0.23 / 0.5 / 1 / 2 / 3 / 4/ 5 mm (Custom-made thickness of block is available)
- Foot switch
- Portable case
- Calibration block*

